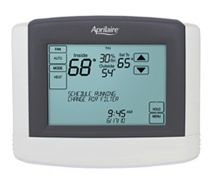
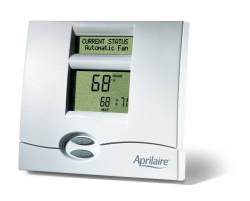
Aprilaire StatNet Thermostats
Aprilaire communicating thermostats offer another excellent option for connecting your thermostat to your XTension system. Xtension build 828 adds the plugin for this thermostat which is available as part of the thermostat control plugin pack.
The connection to XTension is made via a full duplex RS-485 serial connection. You’ll need to get 5 wires to the thermostat location, pulling a cat-5 works fine. When we first added support for these thermostats a full duplex USB/RS485 adaptor was hard to find at a reasonable cost. In the meantime several units are now on the market for under $40 that will work fine. I have tested and found this unit from Gearmo to work perfectly. If you wish to use 2 separate USB/Serial adaptors the interface still supports using a separate interface for the transmit and receive pairs. To do that you need either 2 separate USB/RS485 half duplex adaptors, or 2 regular USB/RS232 adaptors and the very inexpensive 232/485 adaptor devices. If you have a lot of rs232 adaptors around you might save a few bucks doing that, but it adds complexity so for the new installs you should consider the device linked to above which has tested good or a similar FTDI chip based, full duplex RS485 serial adaptor. Other USB/Serial chips can be made to work, but we have found the FTDI based ones to be the best supported and the most trouble free and recommend those.
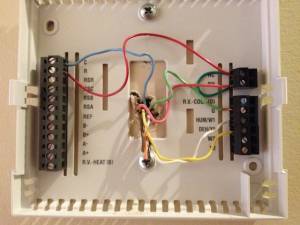
 This picture is of the 8870 model. Wiring it up to the furnace took me a few tries as it wanted the 24v+ connected to 3 places and I didn’t feel that documentation was clear. There are different ways to power the thermostat evidently, it may be powered from the furnace as mine is, or if you have a network already installed the thermostat may be powered from it which is why there are so many different power terminals in the thing. In the picture you can see the blue common runs to the C terminal on the left, even though all the other furnace connections are on the right. Then the red, hot needs to go to 2 ports on the right and finally one on the left. Sorry, I used some green wire in the picture, but knowing that you can follow whats going on.
The network wiring (not shown in this picture) is easy, a twisted pair for the A and B with another wire connected from the “ref” terminal right above them in this picture to the ground reference terminal on your adaptor. If you’re using 2 separate adaptors as I am the ground reference should go to both, the A pair goes to the transmit adaptor and the B pair goes to the alternative reception adaptor as described on the setup page in XTension.
These thermostats are a little more picky about the network configuration. They expect the stats to start their numbering and not skip any numbers. Each stat has to be configured with the setup menus to know what it’s address is and how many other stats there are on the network. This is because it makes unrequested transmissions of data as they change values and in order to keep from bumping into data being sent from other stats it has to know when it’s timeslice on the line is.
It is not necessary to configure XTension with this information, when it starts up the interface it will begin querying for thermostats and set them up to send automatically any changes to it. The only difference between these and other thermostats that we support is that instead of telling you things like “heat status” it will tell you that the W1 relay is on and you have to know that means heat and the Y1 relay means AC.
In XTension create the following units for each Thermostat you have on the network. The Names of the units can be anything that is descriptive to you, the information is routed by the address of each Unit which is a short description of the function followed by a number that is the address of the stat. Create these units to talk to and get info from the Thermostat:
- Current Temperature
- address: TEMP1 (“TEMP” followed by the address of the thermostat)
- dimmable (to receive a value rather than on/off)
- receive only/ignore clicks in list (you can’t change this, it is sent from the stat)
- Current Humidity
- address: HUM1 (“HUM” followed by the address of the thermostat)
- dimmable
- receive only/ignore clicks in list.
- it seems that a stat can be configured for either humidity control or temperature control, or possibly both. Mind doesn’t do humidity and returns only 0’s for this value. If yours is not setup for humidity sensing you can ignore this unit.
- Heat Setpoint
- address: HEAT1 (“HEAT” followed by the address of the thermostat)
- dimmable
- Cool Setpoint
- address: COOL1 (“COOL” followed by the address of the thermostat)
- dimmable
- MODE
- address: MODE1 (“MODE” followed by the address of the stat)
- dimmable
- 0=off, 1=heat, 2=cool, 3=auto
- Fan Mode
- address: FMODE1 (“FMODE” followed by the address of the stat)
- NOT dimmable (off=auto, on=on)
- ‘G’ relay (fan status)
- address: G1 (“G” followed by the address)
- NOT dimmable
- receive only/ignore clicks in list
- this is the fan status relay. If the fan is running this relay MAY be on. For regular heating it is not energized, but if the fan is on ON mode it will turn on.
- Y1 relay (Cool Stage 1)
- address: Y11 (“Y1” followed by the address)
- NOT dimmable
- receive only/ignore clicks in list
- on when calling for first stage cooling in a non-heatpump system and depending on the settings may be energized along with the reversing valve relay for heat in a heatpump system. See your specific setup.
- Y2 relay (Cool Stage 2)
- address: Y21 (“Y2” followed by the address)
- NOT dimmable
- receive only/ignore clicks in list
- if you do not have a 2 stage system you do not need to create this unit, but it will receive updates occasionally in the log.
- W1 relay (Heat Stage 1)
- address: W11 (“W1” followed by the address)
- NOT dimmable
- receive only/ignore clicks in list
- W2 relay (Heat Stage 2)
- address: W21 (“W2” followed by the address)
- NOT dimmable
- receive only/ignore clicks in list
- if you do not have a 2 stage heat system you do not need to create this unit
- B relay (Reversing valve?)
- address: B1 (“B” followed by the address)
- NOT dimmable
- receive only/ignore clicks in list
- on my system this seems to be the reversing valve as it is turned on when heat is being called for and off when AC is called for. But this seems to vary system to system
- O relay (also the reversing valve?)
- address: O1 (“O” followed by the address)
- NOT dimmable
- receive only/ignore clicks in list
- mine is not a heat pump system and I have never seen this value change
There seems to be only vague standardization as to what those are for, make sure to preserve any wiring from your old system and properly setup the new thermostat for the type and brand of system you have. Especially in mutli-stage systems these can be moved around.
The Aprilaire stats also have the ability to display messages and operate as somewhat of a home automation front end by sending key-clicks back for new messages as you navigate the up/down enter buttons. This isn’t supported in this first pass but I am definitely going to do so. There are also more units supported for remote sensors of both temperature and humidity. The operation of these is not immediately obvious to me reading the documentation and not having them to test with I have put off their support as well. If this is something you wish to work with sooner rather than later and are willing to describe how you’d like them to work please drop me an email and I will move the support for it to the top of the list.
Make sure you’ve read the General Thermostat Notes


